
This is a comprehensive guide for those wishing to Jump Higher in Basketball, Volleyball and High Jump, even though jumping activity should not be limited to just these three codes.
This guide to jump higher is also particularly useful for those still learning How To Dunk.
Increasing Your Vertical Jump should not be limited to the training that you do or even the preparation for that training. Diet and Nutrition, combined with Rest and Recover carry equal weight during the performance of Vertical Jump Training.
Jumping higher should not just be about plyometrics either, even though that is all the rage. Weightlifting Jump Exercises also feature on these pages and that is because they also matter during jump activity. Weight resistance can also be incorporated in the exercises that we have listed here.
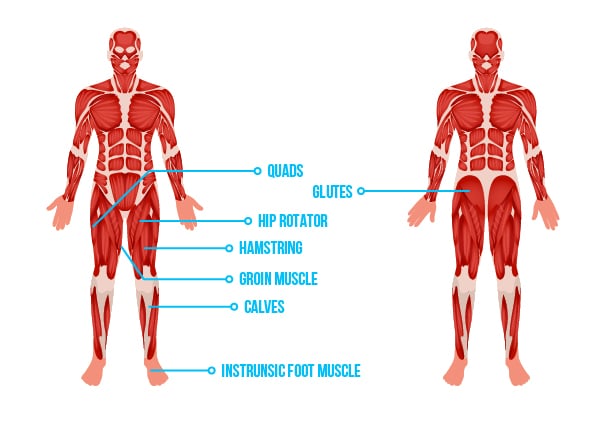
Muscles That Activate when Jumping
Before you complete the jump motion, you need to activate the inside quads, internal and external hip rotators, glutes, interior calf muscles and the intrinsic foot muscles.
You should perform activation exercises for these muscles because they need to be strengthened if you harbor aspirations of firing their sequences properly when jumping. You need to activate these muscles in particular because they are generally underactive.
You then have a set of overactive muscles in the body, which require stretching more than activation. That is because they are normally overactive or tight. That list includes the lateral calf muscles, the quads, lateral hamstring and the groin muscles. You must remember that jumping is all about the stretching and contracting of the muscles. Tight muscles do not stretch or contract so well.
Which Factors Will Determine How High You Will Jump?

1- Finding Your Dominant Foot
Finding your dominant foot matters, whether you are Jumping Off One Leg or Off Two Legs.
When you are jumping off one leg it matters because the dominant foot is the one you need to take off from.
When you are jumping off two legs, knowing which one is the dominant foot matters, especially when taking off from the more complicated running jump.
Under these circumstances, the dominant foot helps ensure that there is not a break in the momentum you gathered before taking off and helps compensate for the difficulties that emerge when you try to coordinate your jump off two feet.
You can find out which is the dominant foot by finding your natural stance on a skateboard or surfboard. You can also figure out which is the dominant foot by pushing off both feet on that skateboard and establishing which is more powerful.
You can also find out which is your dominant foot by running and sliding. The dominant foot is the one which will compensate for any loss of balance during that activity.
If that is not enough for you, you can find the dominant foot by striking a soccer ball at an empty goal. It should be quite easy to spot the stronger and more accurate strike at goal. That will likely come from your more dominant foot.
2- Food And Diet
Most jumping activity demands that your body has the fuel to compete consistently. Under all circumstances, your body’s fuel comes from a carbohydrate-rich diet, which includes things like bread, pasta and rice.
Some experts will tell you that up to 55 percent of total calories should be accounted for by carbohydrates.
Invariably most jump activity also demands that your body be given ample opportunity to recover. However, you will not always have the time to recover, which means that your body needs help from protein sources like fish, poultry and dairy products.
Protein is also important for those looking to build lean body mass, which is critical for those wishing to increase their vertical.
Something which you need to cut out of your diet if you want to jump higher is that food that makes you put on body fat. That includes things like fast food, soft drinks, candy and baked products. This food makes it harder to digest and that hampers your other nutrient intake.
3- Genetics
As controversial as this might be on the face of it, there does appear to be incentive to perform some form of genetic testing on athletes, as a form of talent identification. Doing so will obviously open up a can of political worms.
The desire to explore a bit more in this area has been fueled by findings that there are at least two gene variants in the body that are related to increased power and endurance. While the experts seek more clarity, correlation and consistency in this sphere of study, what we cannot ignore is that being tall and having a wider wingspan contributes to a better vertical jump.
Having a good genetic profile is one thing but that can only ever be fully exploited if and when an athlete trains correctly and consistently, when trying to jump higher. One should not go without the other.
4- Jumping Form
This is essentially about developing the right technique for jumping. The key to increasing your vertical jump is knowing how to take off and land correctly. And to do that without losing your form. At the forefront of your thinking should be what happens with the bottom half of your body, before you start working your way up.
Before you prepare to jump, you want your feet to be positioned underneath your shoulders.
Having your feet shoulder-width apart is critical to the generation of power when jumping. When you prepare to take off, you want to be positioned on the balls of your feet and your heels should not be touching the ground.
When you prepare to jump, you should bend at your ankles, then bend at your knees and flex your hips. When you lower the weight of your body, you are loading your glutes and storing the elastic energy you need to explode into the air.
Before You Start Your Jump Training (Do This)
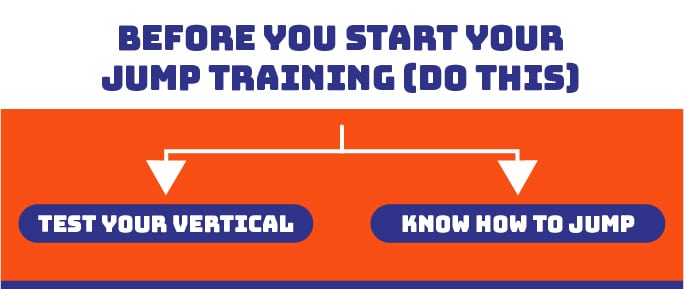
1- Test Your Vertical Jump
You should Test Your Vertical Jump before you start a jump training program, so that you can Monitor and Measure Your Progress for the duration of that program. You should keep testing your vertical jump for the duration of that jump training program, to firmly establish whether it does or does not work.
2- Know How To Jump
If you want to jump higher, mastering the jump technique is just as important as producing and releasing explosive power. Before you can master that technique, you must develop a better grasp of the biomechanics involved - whether that be for the running or standing jump. The biomechanics includes the run-up, the take-off, being airborne and landing when performing the jump motion.
How To Jump Higher: 12 Killer Exercises to Improve Vertical
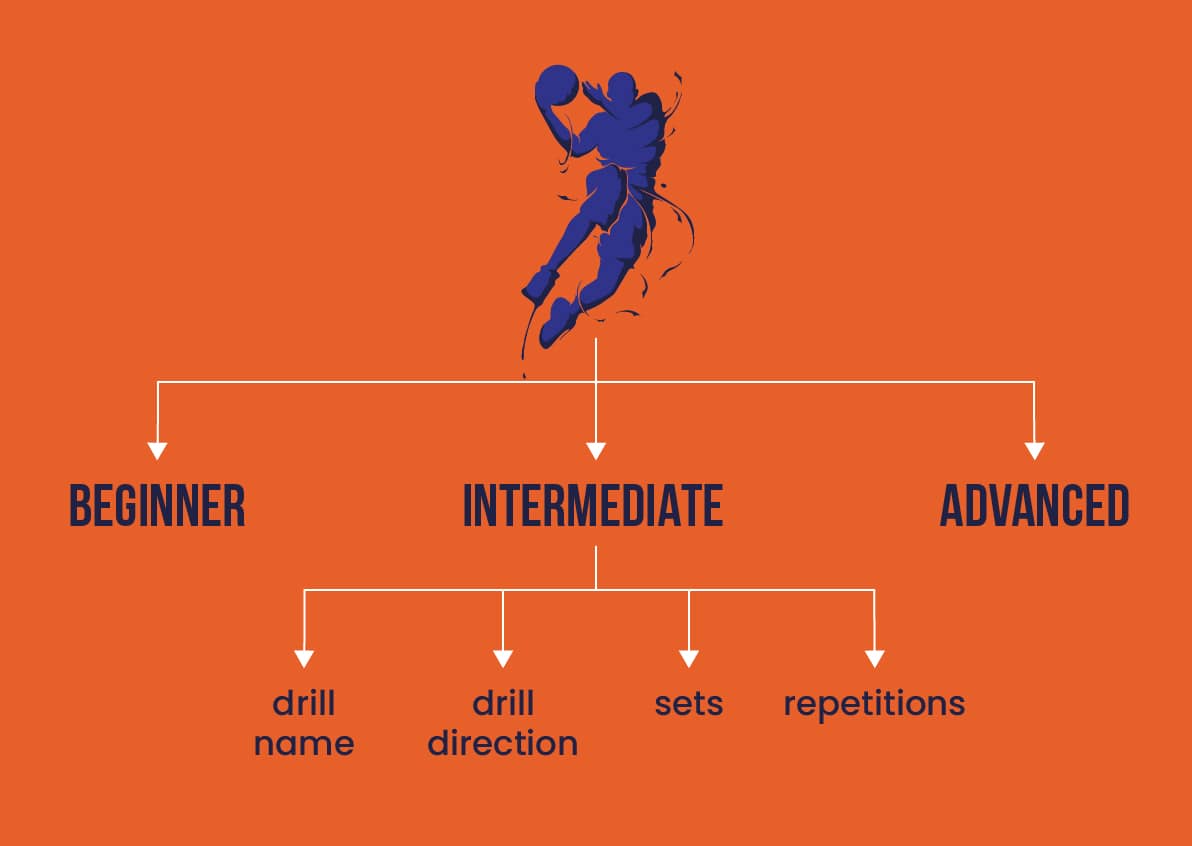
- Beginner Exercises
1- Depth Jump
Drill Goal:
Teaches the lower leg muscles to generate explosive power. It is a good exercise for muscle memory.
Drill Direction:
For this routine, like so many jump routines, you need to find yourself an elevated box or surface. The critical factor here is that this elevated box be stable enough to handle your weight.
Your role in this activity is also simple.
First you should step onto that box with both feet. Once on top, you will then step off the elevated box. That might come across as being incredibly mundane but just hang in there, as there is a method to the madness.
Once both your feet are safely planted on the ground, you must then explode into the air. The goal is to jump as high into the air as possible. The other goal is to launch that jump into the air almost immediately.
Throughout these pages we have and will continue to wax lyrical about countermovement because that is the best way to jump. When performing this drill, you should focus on that countermovement but also focus on executing that countermovement quickly or “under pressure”.
Starting this drill with a box that is about 12 inches high is normally a good idea. You can progress from there, the stronger and more confident that you get. Each set you complete should include about five reps.
There is no harm in doing four or five sets per day either. The breaks between sets do not need to be that long too. They should not extend beyond 20 seconds and we would honestly be a little surprised if you felt that you needed longer than that to recover.
2- Lateral Jumps
Drill Goal:
This will teach you to better coordinate the parts of your body that contribute most to a vertical jump. Keeping the torso and legs in sync when jumping can be a tough business for the uninitiated. Your quads, glutes and hamstrings will also get a serious working over with this routine.
Drill Direction:
You can be creative with this exercise but perhaps the simplest way to go about it is by acquiring a suspended bar that you can jump over from side to side. Cones or mini hurdles are also useful and convenient.
There is no need to be silly either. Keep that bar as close to the ground as possible and try not to place too much emphasis on the height. Instead you should focus more on jumping from side to side - balance.
Start the drill while standing in somewhat of an athletic position, with your knees slightly bent. You can choose which side of the bar you want to start the drill from.
With the leg that is furthest away from the bar, push yourself to the other side of the bar and land on your opposite bar. It is more of a hop than a jump, really.
Once you land on your opposite foot - and on the other side of the bar, push yourself back to the starting position again.
For the drill you are always taking off on one foot and landing on one foot, all the while alternating. If you have ever tried skating or rollerblading, this routine is what it should feel like but you obviously will not be moving forward.
20 reps per set should be sufficient here, with a 60-second break in between reps. The more comfortable and more balanced you become, the faster you will be. Time how long it takes to complete 20 reps when you start and keeping that time, you can work on increasing the number of reps you complete within that frame.
3- Tuck Jumps
Drill Goal:
To give your lower body muscles a serious working over. You will also need to improve the level of your coordination to execute this drill with any meaning. In and of itself, this drill will help you realize that goal. The hamstrings, quads, calves, core and glutes will all benefit from this exercise.
Drill Direction:
We have put this drill under beginner level because it remains an easy drill to execute, even though executing it with considerable aplomb can be tough.
The simplicity with the tuck jump lies in that you will start from a stationary and standing position. You can stand with your feet very slightly apart, just past hip width. This is your ultimate countermovement routine.
From the standing position, you should then squat and from their release some explosive power to propel yourself as high into the air as possible.
Once you are fully extended into the air, with the help of your upper limbs which are critical to helping you jump higher, the task will be to pull your knees up towards your chest. You will tuck those knees under your chest while airborne.
You should then extend those knees out before you land in what would be an athletic position.
Try to do three or four reps at a time and try not to rush those reps either because that can be counterproductive.
Two or three sets of these every day should be just right. Once you feel comfortable at that level, you can then look to progress by increasing your workload. Remember that your joints go through a tremendous amount when you complete tuck jumps, which is why you should always be cautious about overdoing this. Less is always more with this routine.
4- Jumping Jacks
Drill Goal:
To improve the capacity of your cardiovascular system.
Drill Direction:
The convention would be to start this drill standing with your feet apart. They should be more or less in line with your hips.
You should also place your arms at your sides - rest them on your hips if you must. Then you should raise your arms out to the side, to above head height.
As you raise your arms, jump and pull your legs wider apart - until they are somewhere in line with your shoulders and land.
At this point you should not pause, but rather you should reverse the movement or return to that starting position.
Every time that you reverse the movement would constitute one rep.
With this routine we place less emphasis on the actual reps and more on the time you spend jumping. Try going at this for about 60 seconds at a time, before resting for about 30 seconds.
Exercise | Reps | Sets | Rest | Training Days |
|---|---|---|---|---|
Depth Jumps | 6-8 Reps | 3-4 Sets | 30 Seconds Between Sets | Twice a Week |
Lateral Jumps | 10-15 Reps | 3 Sets | 60 Seconds Between Sets | Twice A Week |
Tuck Jumps | 5-10 Reps | 3 Sets | 60 Seconds Between Sets | Twice A Week |
Jumping Jacks | 10 Reps | 2 Sets | 20 Seconds Between Sets | Twice A Week |
- Intermediate exercises
5- Back Squat
Drill Goal:
If you do not strengthen your glutes, hamstrings and quads with this routine, you are probably doing it wrong. Increasing lower body strength is at the heart of this exercise routine.
Drill Direction:
As a point of departure, it is worth mentioning that back squats are the one drill that many people can get horribly wrong and it is perhaps prudent to get the guidance of a personal trainer at your local gym when you are doing them for the first time. The risk to injury is high and that injury can be quite serious too.
Start this routine standing with your feet about shoulder-width apart. When you are in the back squat stance, your feet should also be faced slightly outwards. Once again, this is not a one-size-fits all example and seek as much advice as possible from somebody with a little more experience than you before you start with these.
If you choose to complete this routine with a high bar, the bar will invariably sit more or less on your collar. If you execute this routine with the low bar, it should invariably sit somewhere in the region of three inches below that.
The higher the bar in the routine, the more upright the position of your body will be. Likewise the exercise outcomes will vary a little as a result.
Once you have adjusted the height of the bar for this routine on the exercise rack, you will then position the bar on your back so that it sits evenly. You will then carefully lift the bar off the rack while rested on your back and with the support of your two hands. Striking the right balance is critical here.
When you are confident about stability, you should then lower yourself into a squat position and then push yourself back upwards. Maintain the tension of your body throughout this routine. Do not flop or bend forward.
Do not let your knees collapse inwards at any stage during the routine and do not lift your heels off the ground either. Start this routine by doing four sets of three reps and try to progress from there.
Again, seek the advice of a personal trainer when doing this. The worst thing you can do with this routine is overdoing it. If done right this is a very effective routine and simple enough.
However, the dangers are very real too.
6- Rear Foot Elevated Foot Squat
Drill Goal:This drill will increase your hip and lower leg strength. Your quads will get a serious working over with this drill too.
Drill Direction:
You need a prop to complete this drill. A box or elevated surface should more than suffice. That box will be placed directly behind you.
You should then stretch your back foot out behind you, placing the balls of your foot on the box or elevated surface.
You should then bend your front knee until it is in a squat position - that is about a 90-degree angle from the ground.
Do not let that front knee bend flex until it is in front of your toes though. That is too much of a flex.
When you do this, your back leg will also squat but obviously from a slightly elevated position. This routine will teach your body to coordinate itself too, even though the routine places tremendous emphasis on strengthening the relevant muscle groups.
Once you have squatted, you will then drive your body up into the starting position once again. Once you are done with a set, you should then extend the positions of the legs and do a set from that alternate position.
As a form of progression, you can then complete this routine with some weight resistance.
7- Box Jumps
Drill Goal:
To increase your explosive power when jumping
Drill Direction:
Finding a suitable and stable box is probably a good place to start. A box that is about 50cm high should be just the tonic, when you are starting out with this drill.
You can then challenge yourself a little more, the stronger and more confident you become.
Starting in a standing position, the box should be directly in front of you.
Drag your feet apart to about shoulder width. Once you are ready, you will then lower yourself into a squatting position before exploding onto the top of the box.
Once on top you will then jump back down. It is as simple as that. When you feel like you need a little more power, you can then focus on using a little more countermovement for greater explosive power. Or you can increase the height of the box a little.
We suggest doing about five reps per set with these and perhaps three or four sets should be sufficient for a day’s training session. Give yourself somewhere in the region of a minute and a half to rest before going at it again.
8- Jump Lunge
Drill Goal:
To strengthen your lower body and your core
Drill Direction:
Start the drill in an athletic position. Something similar to what you would see at the start of a middle distance race in track and field.
Sink down into a forward lunge - with one foot in front of your body and the other foot behind your body.
This might come naturally but try to be conscious of opposing legs and arms being in front of and behind you when lunging. So, if your right leg is in front of you, your left arm should be in front of you at the same time.
Once you are in the lunge position, you should explode upwards with both of your feet leaving the ground. At this point your legs would have switched positions before you land in a lunging position again.
Each time you alternate leg positions constitutes one rep.
For starters, 10 reps per cycle is more than sufficient, followed by a brief break. The more accomplished and stronger you become, the better placed you will be to complete longer reps.
Exercise | Reps | Sets | Rest | Training Days |
|---|---|---|---|---|
Back Squats | 10 Reps | 3-5 Sets | 40 Seconds Between Sets | Three Times A Week |
RF Elevated Squat | 10 Reps | 4 Sets | 30 Seconds Between Sets | Three Times A Week |
Box Jumps | 10 Reps | 3 Sets | 30 Seconds Between Sets | Three Times A Week |
Jump Lunges | 10-20 Reps | 3-4 Sets | 30-60 Seconds Between Sets | Three Times A Week |
- Advanced exercises
9- Burpees
Drill Goal:
To burn fat and calories quickly, while strengthening the core muscle groups in your body.
Drill Direction:
When you complete a burpee you are in effect doing two things. You are doing a push-up, before leaping into the air.
The convention is to start this routine by being in a squatting position. Then lower yourself into the push-up position, do the push-up (which in and of itself can be difficult at the best of times).
Once you have completed the push-up, you will then bounce yourself back up into the squatting position - almost like a frog. Then stand up and jump as high as you can into the air. Use your arms to try and propel further into the air.
When you land you will be in the start position again and that would constitute one rep. Try and do this repeatedly for about one minute. We gather that you will complete about 20 reps within that minute, before taking a short break for recovery.
10- Burpee Box Jump
Drill Goal:
To increase the capacity of both your heart and your lungs.
Drill Direction:
This is your standard burpee with an added complication - it is called a box. Just make sure that the box is able to carry your weight.
When starting this drill, the box should be directly in front of you. With the normal burpee you would jump into the air. This time, you will jump onto the box instead.
Once on the box, you will then jump straight backwards onto the floor. That would constitute one rep. Your balance and coordination will be tested a little more here.
Don’t focus on the reps though. Try to focus on the time spent doing those reps. About one minute of this is a good number. If you can complete 20 reps during that time, you are doing pretty well.
11- Medicine Ball Burpees
Drill Goal:To give your entire body and the related muscle groups a serious working over and assimilate a game environment.
Drill Direction:
Well, you can do this variation of the drill with either a medicine ball or better still a basketball. We are running with the basketball because basketball is one of those sports where jumping is so critical.
Instead of doing the push-up with your hands resting on the ground, your hands will instead be rested on the basketball.
When you subsequently leap into the air, you are actually going to try and keep that ball in both of your hands.
Take that ball and tap it onto the backboard of a basketball hoop. If you are nowhere near a basketball hoop, you can just set yourself a height target and then tap the ball on that section of what we presume will be a wall.
Then come back down and start again. The degree of difficulty is a little higher with this one but we again suggest going at this for about a minute and see how many reps you can complete. It is one exercise that belongs in the difficult section on these pages.
12- Jump Pull Ups
Drill Goal:
These workouts are meant to strengthen the lower body, the forearms and your body’s core..
Drill Direction:
To start this routine you need a stable diagonal bar, which you will use to pull yourself up, which is the core movement with this routine.
You will also need a box to stand on before pulling yourself up. Try and place both of your feet directly underneath the bar in question - so not too far back and not too far forward.
You will then grip the bar and subsequently jump/pull yourself up into the air. Your chin should find itself just above the height of the bar at your peak height.
The real trick with this routine is to avoid controlling your descent before landing on both of your feet. So, you want to just jump up and down, even though your hands are still gripped on the bar.
Exercise | Reps | Sets | Rest | Training Days |
|---|---|---|---|---|
Burpees | Maximum Reps Per 15 Minutes | 2-3 Sets | 90 Seconds Between Sets | Four Days A Week |
Burpees Box Jumps | 10 Reps | 3-5 Sets | 60 Seconds Between Sets | Four Days A Week |
Medicine Ball Burpees | 10-20 Reps | 2-4 Sets | 60 Seconds Between Sets | Four Days A Week |
Jump Pull Ups | 10-20 Reps | 2-4 Sets | 90 Seconds Between Sets | Four Days A Week |
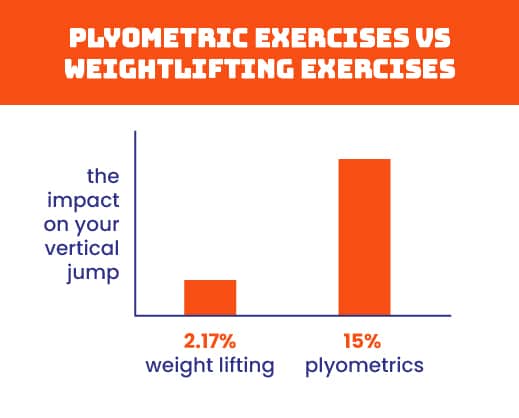
Why Plyometric Exercises Specifically?
Jump training program are mostly associated with plyometrics training because you can expect to increase your vertical jump by up to 15 percent when performing plyometrics.
While weight training also contributes to an increased vertical, the most compelling findings about its impact on the vertical jump reveal that you can only really expect a gain of 2.17 percent in jump performance after completing weight training programs in isolation. That applies for all traditional weight training exercises.
Plyometrics are clearly the better option for your training.
The Difference Between Beginner, Intermediate And Advanced Exercises
Common Question | Beginner | Intermediate | Advanced |
|---|---|---|---|
Injury Risks | Low | Medium | High |
Training Frequency | 2 Days Per Week | 3 Days Per Week | 4 Days Per Week |
Difficulty Level | Easy | Hard | Very Hard |
Volume | Low | Medium | Hard |
Rest And Recovery | More Than 48 Hours Per Week | 48 Hours Per Week | Less Than 48 Hours per Week |
Muscle Action | Mostly Concentric | Mostly Eccentric | Mostly Isometric |
Resistance | Less than 50% of 1RM | Between 50-80% of 1RM | Greater than 80% of 1RM |
Tips On Improving Your Vertical Jump
1- To improve your vertical jump, you need Shoes That Are Lighter than most, have better traction than most, better ventilation than most and most importantly, shoes that are a better and more comfortable fit than most.
2- To improve your vertical jump you should also warm up thoroughly, primarily to increase the blood flow to those muscles that you use most for jumping. You also warm-up to decrease your exposure to injury, while also reducing the pain experienced by your body during training and taking part in jump-related activity.
Equally important as warming up is cooling your body down, which assists your body with the recovery that it needs before getting back to the grind.
Conclusion
At its core, trying to jump higher is motivated by the desire to compete better. It is more about external performance than it is about internal health.
However, what you will most likely find during your endeavors to reach for the stars is that you can actually strike two birds over with one stone.
Your quest to jump higher can improve your health and even actually treat some disease. It is most uncanny.
As you have seen throughout this article, having the right equipment does a considerable amount to help you realize your set targets but the onus is ultimately on you to get better at this.
Shoes, weights, ropes and machines will do half the work for you. However, the effort that you put into a comprehensive training regimen is what will separate the boys from the men.
Hey, I’m Aleksandar and I am a Basketball freak! That is why I decided to create this blog. Teaching people How to dunk a basketball and How to Jump Higher in this sport or other related sports that require vertical jumping, is my specialty. If that’s your aim, then you have come to the right place.